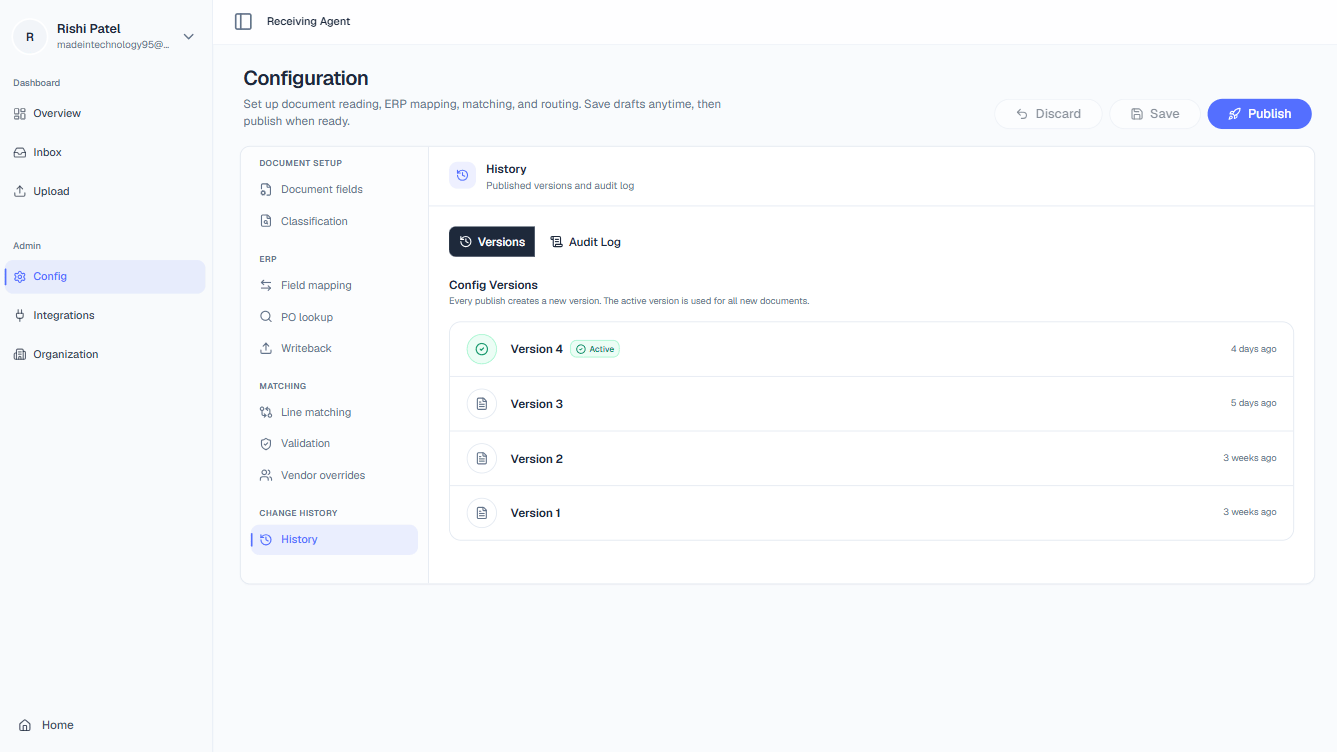
Publishing a Configuration
1
Make your changes in Admin > Config
Navigate to Admin > Config and update any settings across the Extraction, Context, ERP, Match, or Route tabs. Changes remain in a draft state and do not affect live document processing until you publish.
2
Review your changes
Before publishing, scan through the affected tabs to confirm every change is intentional. Pay particular attention to tolerance values, required flags, and partial receipt policy, as these have the most direct impact on automation rates.
3
Click Publish
Click the Publish button at the top of the Config page. The platform validates your configuration for completeness, then saves a new numbered version snapshot (e.g., Version 13).
4
The new version becomes Active immediately
As soon as publishing completes, the new version is marked Active and all documents that arrive from that moment onward are processed using the updated rules. Documents already in progress continue to completion under the version that was active when they were received.
Rolling Back to a Previous Version
If a published configuration causes unexpected results, such as a spike in auto-rejections or documents being routed to the wrong queue, you can revert to any earlier version without needing to manually undo individual settings. To roll back:- Open Admin > Config > Versions.
- Browse the version history list. Each entry shows the version number, the user who published it, and the timestamp.
- Click the version you want to restore.
- Click Set as Active. The selected version is immediately reactivated and becomes the new active configuration.
Rolling back does not delete newer versions. Your version history remains intact, so you can re-activate a more recent version at any time or use newer versions as a reference while you investigate what went wrong.