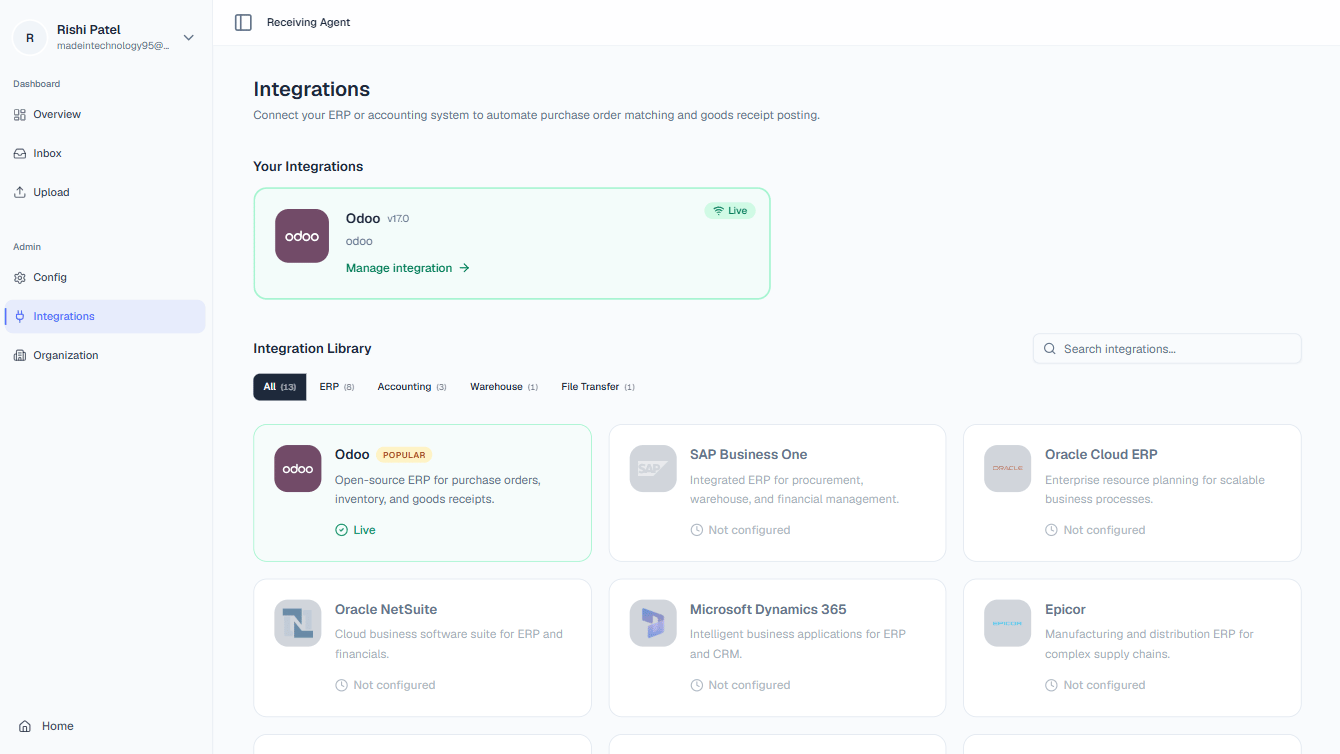
Supported Systems
ERP Systems
Odoo
Connect to Odoo 14, 15, or 16 via XML-RPC. Supports PO lookup and goods receipt writeback.
SAP Business One
Integrate with SAP B1 using the Service Layer REST API for PO matching and delivery posting.
Oracle NetSuite
Connect via NetSuite SuiteTalk REST to fetch purchase orders and post item receipts.
Microsoft Dynamics 365
Link to Dynamics 365 Business Central or Finance & Operations via OAuth2 and OData APIs.
Many More
Check our official product page to explore the complete list. You can also request a custom integration if needed.
Accounting Systems
QuickBooks
Connect to QuickBooks Online to sync vendor bills and purchase order data.
Xero
Integrate with Xero to pull purchase orders and push confirmed receipt data.
Connecting an Integration
1
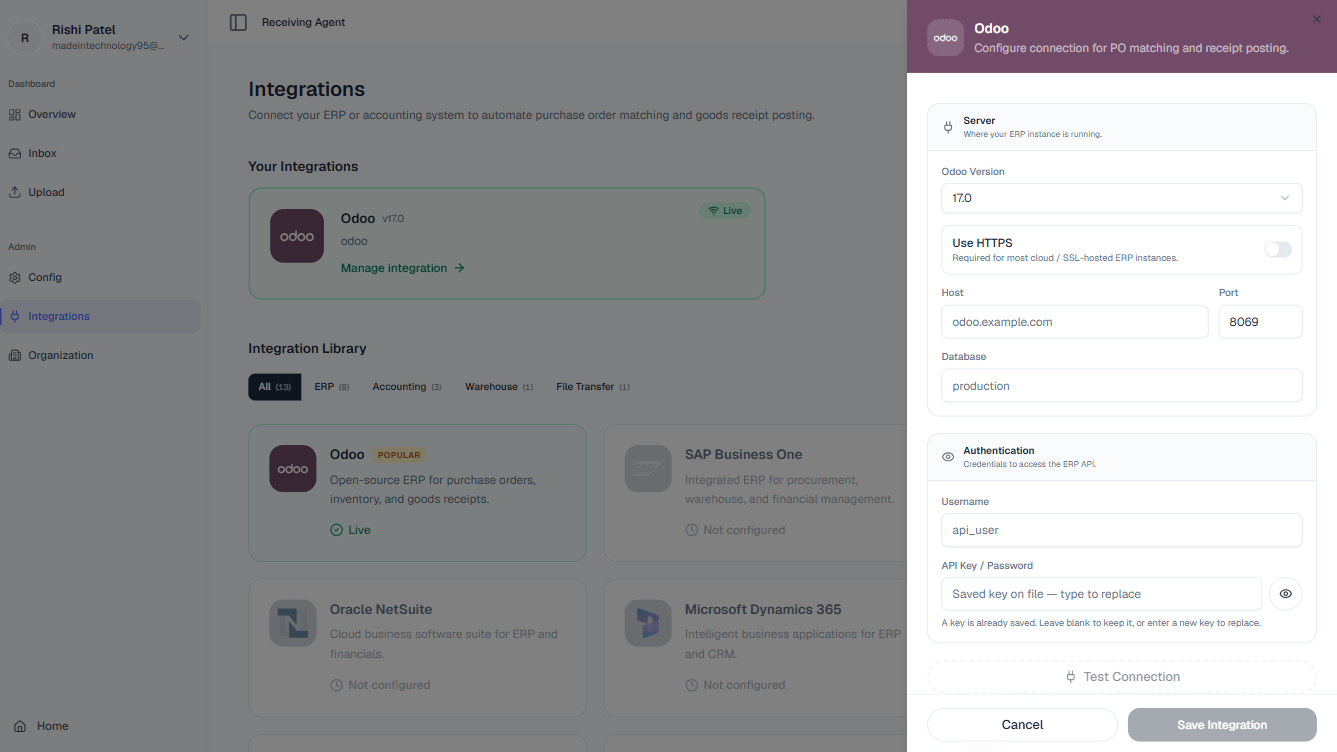
Open Admin > Integrations
Navigate to Admin in the top navigation bar, then select Integrations from the left sidebar. You will see the full Integration Library.
2
Select your system
Find the card for your ERP or accounting system in the Integration Library and click it. A slide-out configuration pane will open on the right.
3
Enter your credentials
Fill in the required connection details in the slide-out pane. Fields vary by system but typically include:
string
required
The base URL or hostname of your ERP instance (e.g.,
https://erp.yourcompany.com).number
The TCP port your ERP listens on, if non-standard (e.g.,
8069 for Odoo).string
The name of the ERP database to connect to.
string
required
The service account username with API access rights.
string
required
The API key or password for the service account. Stored encrypted at rest.
4
Test the connection
Click Test Connection. The platform will attempt a live connection to your ERP using the credentials you provided and report success or a descriptive error message.
5
Save the integration
Once the test passes, click Save Integration. The integration will become active and appear at the top of the Integrations page.
Managing Active Integrations
Active integrations always appear at the top of the Integrations page, separated from available (not yet connected) systems. Each active integration displays a live health status badge that reflects the most recent connectivity check:
Click any active integration card to edit credentials, re-run a connection test, or deactivate the integration.
All credentials you enter — including API keys and passwords — are encrypted at rest using AES-256 and are never stored or logged in plain text.